My GPU fans used to sound like a tiny jet engine preparing for takeoff every time I launched a game. I genuinely used to put on headphones just to drown out the noise, even when I wasn’t watching anything, just so I could hear my own thoughts over the whirring.
I assumed that was just how gaming PCs sounded. Loud fans, hot case, deal with it. Then a friend mentioned undervolting almost as a throwaway comment, and I brushed it off at first because it sounded like something that would either damage my GPU or barely make a difference.
I was wrong on both counts. Once I actually tried it properly, my temperatures dropped, my fans calmed down significantly, and my performance didn’t drop the way I expected it to. If anything, it stayed almost identical.
If your GPU runs hot and loud during gaming sessions, this is everything I learned from actually doing this myself, mistakes included.
What Undervolting Actually Means (Without The Confusing Jargon)
Undervolting means reducing the voltage your GPU uses while still maintaining the same or similar clock speeds. Graphics cards are usually shipped with more voltage than they actually need, partly because manufacturers want to guarantee stability across a huge range of different chips, even the slightly weaker ones from the same production batch.
That extra voltage generates extra heat, which then requires your fans to spin faster to compensate. By lowering the voltage to what your specific card actually needs, you reduce heat generation without necessarily losing performance.
I want to be upfront about something important: this isn’t overclocking. You’re not trying to push your GPU further than it’s rated for. You’re trying to make it run cooler and quieter while doing the same job it was already doing.
My First Attempt (Which Didn’t Go Great)
The first time I tried undervolting, I got a little too aggressive. I dropped my voltage way lower than I should have because I saw someone online mention an extreme number and assumed lower was automatically better.
My game crashed within ten minutes. Not damaged anything, just crashed, because I’d pushed the voltage too low for my GPU to maintain stability at the clock speeds it was trying to run. That taught me undervolting is a process of small, careful adjustments, not one dramatic change.
Step-by-Step: How I Actually Did This Properly
Step 1: Download MSI Afterburner
This is the tool almost everyone uses for undervolting, regardless of whether you actually own an MSI graphics card. It works with Nvidia and AMD cards alike. Download it directly from the official MSI Afterburner website, not any third-party mirror site.
Alongside Afterburner, I also downloaded a benchmarking tool called Unigine Heaven to stress test stability after each change, though something like 3DMark works just as well if you already own it.
Step 2: Check Your Current Temperatures And Clock Speeds First
Before changing anything, run your usual game or a benchmark and note down your average temperature, clock speed, and fan noise as a baseline. I didn’t do this properly the first time and had no clear way to actually measure if my changes were working.
For me, my baseline was sitting around 78-80°C under load with fans audibly ramping up within a few minutes of gaming.
Step 3: Open The Voltage/Frequency Curve Editor
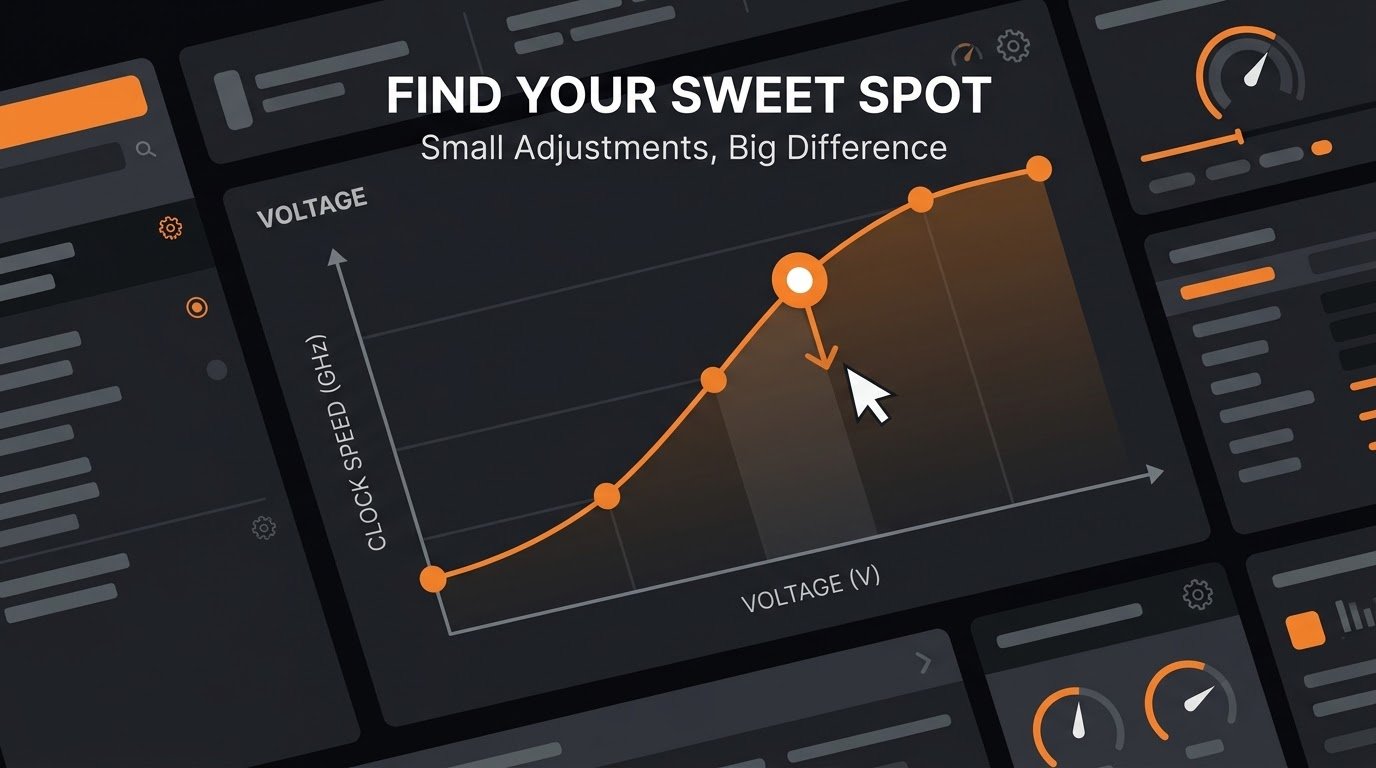
In MSI Afterburner, click the small curve icon near the bottom of the interface, or access it through the Settings menu depending on your version. This opens a graph showing your GPU’s voltage-to-clock-speed relationship.
This part looked intimidating the first time I saw it, but it’s genuinely simpler than it appears once you understand what you’re looking at.
Step 4: Find Your Sweet Spot Point On The Curve
Look for a point on the curve where the line starts to flatten out, meaning increasing voltage further isn’t giving you meaningfully higher clock speeds anymore. This flat point is usually your best target for undervolting.
Click on that point on the curve, then drag it downward slightly to reduce the voltage while keeping the clock speed roughly the same. I started by reducing voltage by around 50mV as a conservative first test.
Step 5: Apply And Stress Test Immediately
After making the adjustment, click “Apply” in Afterburner, then run your stress testing tool for at least 15-20 minutes. Watch for crashes, screen artifacts (weird colored specks or glitches on screen), or driver crashes.
If everything runs stable, you can go back and reduce voltage slightly further, testing again after each change. If you get a crash or visual glitches, that means you went too low, and you should raise the voltage back up slightly from that point.
Step 6: Fine-Tune Gradually, Don’t Rush It
This was my actual mistake the first time around. I tried to save time by making one big adjustment instead of several small ones. Small, gradual changes with proper testing between each one is the only way to actually find your GPU’s real stable limit.
It took me about 40 minutes of careful testing to land on a voltage reduction that was both stable and noticeably cooler than my default settings. That’s normal. Don’t rush this part.
Step 7: Save Your Profile
Once you’ve found a stable, cooler configuration, save it as a profile within MSI Afterburner. I’d also recommend enabling Afterburner to start with Windows so your undervolt settings automatically apply every time you boot up, otherwise it resets back to default voltage after a restart.
My Actual Results After Undervolting
After settling on a stable undervolt, my GPU temperature during gaming sessions dropped from around 78-80°C down to a consistent 65-68°C. That’s a genuinely significant drop.
My fan noise dropped noticeably too. I stopped needing headphones just to block out fan noise during quieter moments in games. And here’s the part that actually surprised me most: my in-game frame rates stayed virtually identical, sometimes even slightly more consistent, likely because my GPU wasn’t thermal throttling as often under sustained load.
If you’re also dealing with heat-related performance issues on the CPU side of things, I actually went through a very similar troubleshooting process for that specifically in How to Fix High CPU Usage While Gaming, which covers a lot of related cooling and performance concepts if your whole system runs hot, not just your GPU.

Common Mistakes People Make When Undervolting
Reducing voltage too aggressively on the first attempt. I did exactly this and dealt with unnecessary crashes because of it. Small, gradual adjustments work far better than one dramatic change.
Not stress testing properly before trusting the results. A stable five-minute test doesn’t guarantee stability during a two-hour gaming session. I always test for at least 15-20 minutes minimum now, sometimes longer for demanding titles.
Forgetting to save the profile or enable auto-start. I actually did this once and was confused why my temperatures were back to normal after restarting my PC, completely forgetting my settings had reset.
Assuming undervolting will noticeably boost frame rates. It won’t dramatically increase performance. The real benefit is lower temperatures, quieter fans, and occasionally slightly more consistent performance from reduced thermal throttling, not a straight frame rate boost.
Skipping the baseline measurement step. Without knowing your original temperatures and performance, you genuinely can’t tell if your undervolt is actually working or not.
Final Thoughts
Undervolting completely changed how my PC feels to use day to day. It’s quieter, runs cooler, and I didn’t lose any noticeable performance in exchange. Honestly, I wish I’d tried this years before I actually did instead of just accepting loud fans as a normal part of PC gaming.
It does take a bit of patience to find your specific card’s sweet spot, and I’d genuinely recommend taking it slow rather than rushing through it like I did on my first attempt. Small adjustments, proper testing, and a little bit of trial and error will get you there.
If your setup runs hot and loud during gaming sessions, this is one of the few tweaks that costs absolutely nothing and takes less than an hour to properly set up.
For more technical details on how voltage and clock speeds relate specifically to your GPU model, TechPowerUp’s GPU database is a solid resource to check your card’s stock voltage and clock behavior before you start experimenting.